Let’s Kick Things Off: The Intro
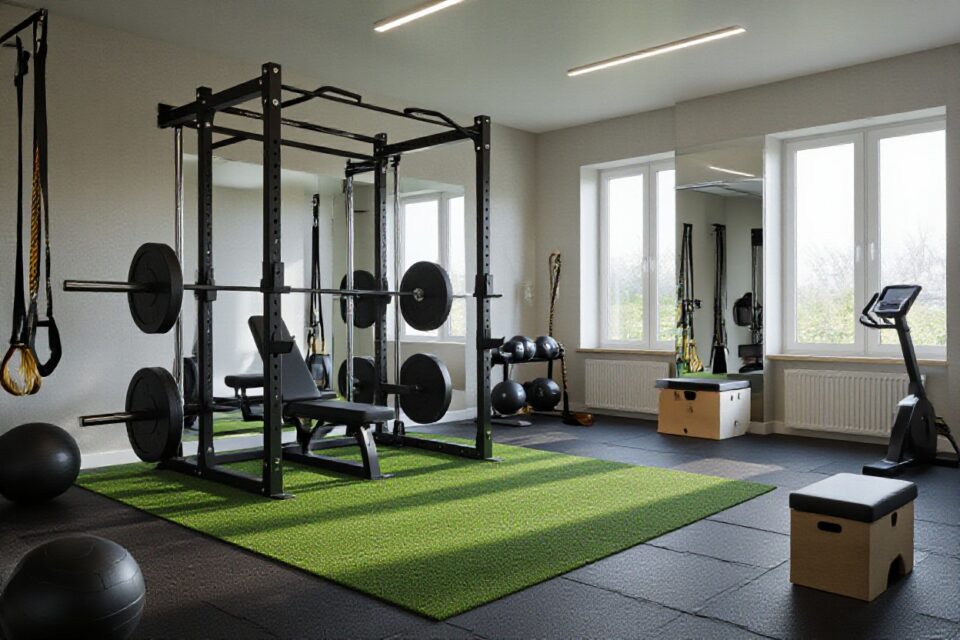
Instead of chasing a giant machine that does everything badly, you’re building a tight setup that does the crucials ridiculously well. You’re aiming for a space where a 20 minute EMOM, heavy carries, and mobility flows all fit without dragging plates across the living room. Studies show you can hit 90% of commercial gym strength results at home with just 4-6 smart pieces of gear, so your layout, storage, and lighting matter way more than you think – and if you want higher-end ideas, the Luxury Home Gym Design Guide | Iron House 2026 shows how people are doing exactly that in under 150 square feet.
What Kinds of Gear Do You Really Need?
You’ve probably seen those monster home gyms on Instagram, but for solid functional training you actually need way less stuff. Start with gear that lets you push, pull, hinge, squat, carry and rotate, then layer on only what fits your space and budget. The goal is simple: build a setup you’ll actually use 3-5 times a week, not a museum of shiny, dusty equipment.
Must-Have Equipment for Functional Training
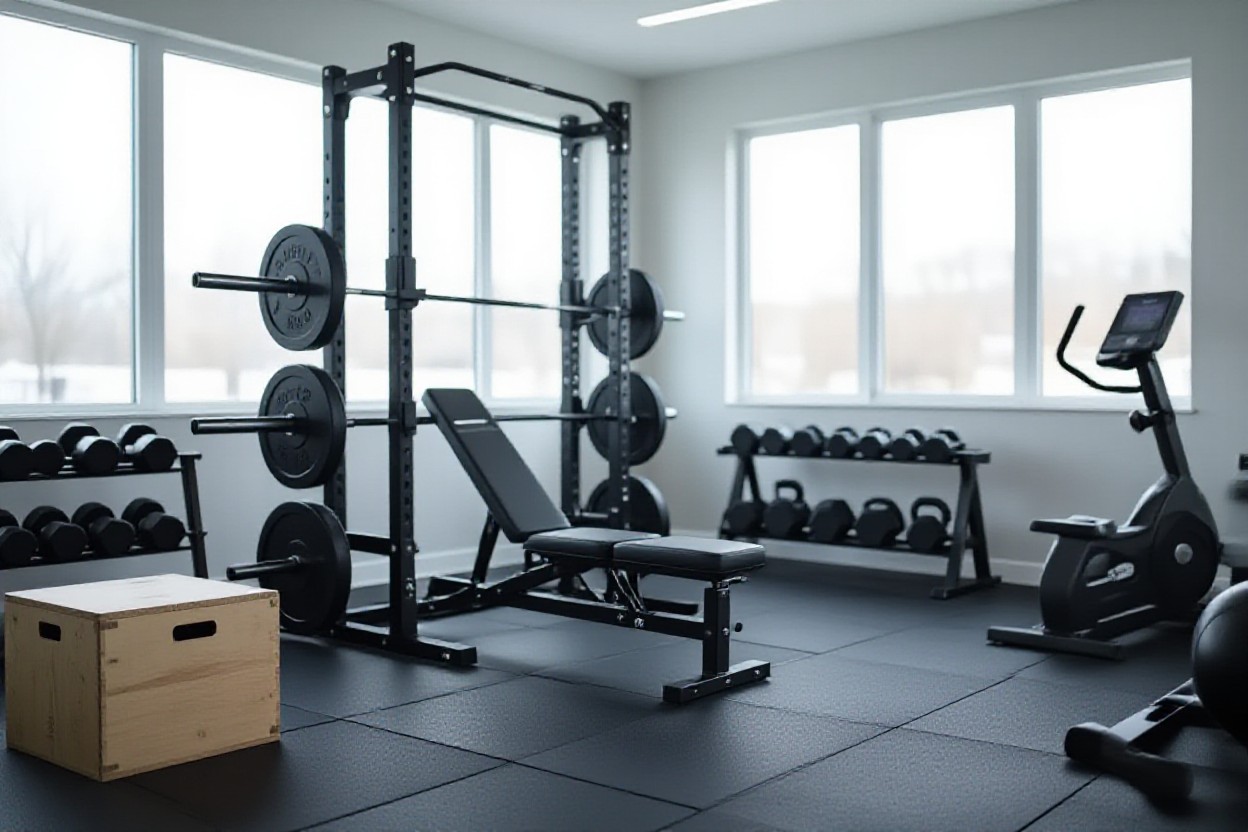
If you had to cap your cart at a few items, go with adjustable dumbbells, a couple kettlebells, resistance bands, and a solid flat bench or low box. Those four things alone cover loaded carries, rows, presses, squats, lunges, anti-rotation work – pretty much the whole functional checklist. Toss in a pull-up bar and a quality mat and suddenly your tiny corner setup can easily handle 200+ different exercises without feeling repetitive.
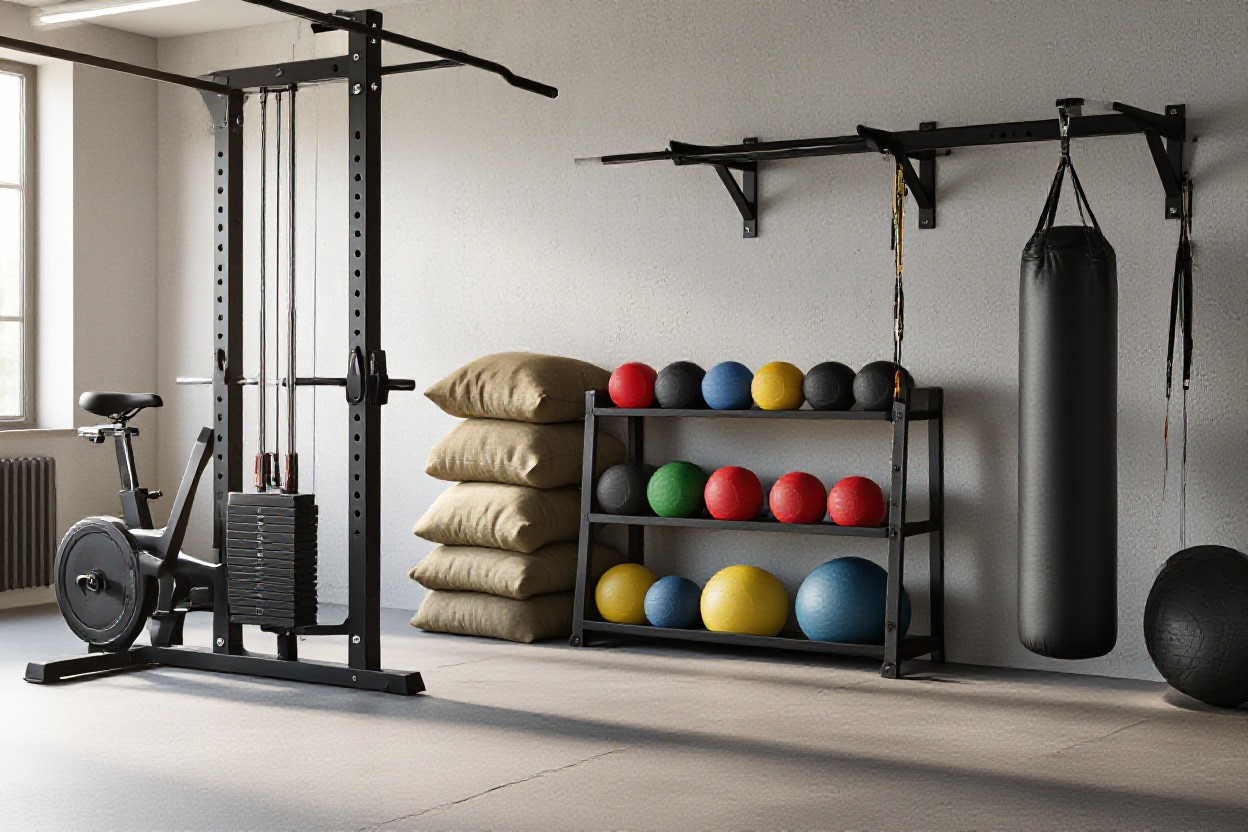
Extras That Might Just Change Your Game
A client once added a suspension trainer and a 40 kg sandbag to his already decent setup and his whole program leveled up in a week. Stuff like sliders, a landmine attachment, a weighted vest, or a trap bar isn’t mandatory, but it can unlock new patterns, new loading options, and way more fun. If you pick 1-2 extras that match your goals – not just what looks cool – you’re suddenly training like an athlete, not just “working out”.
What usually surprises people is how much these extras fix gaps you didn’t know you had. A suspension trainer lets you do rehab-friendly rows, core work and single-leg patterns without needing heavy loads, while a trap bar can drop knee stress by up to 20% compared to straight bar deadlifts, which is huge if you’re over 35 and your joints talk back. Sliders turn basic lunges into serious strength-and-stability drills, and a simple 10 kg weight vest can bump your step-ups, push-ups, and walks into a legit conditioning block without adding a single new movement. So when you’re choosing extras, think like this: which 1-3 pieces will make your current workouts harder, safer, or more interesting, not just add clutter – that filter alone keeps your gear tight and your results big.
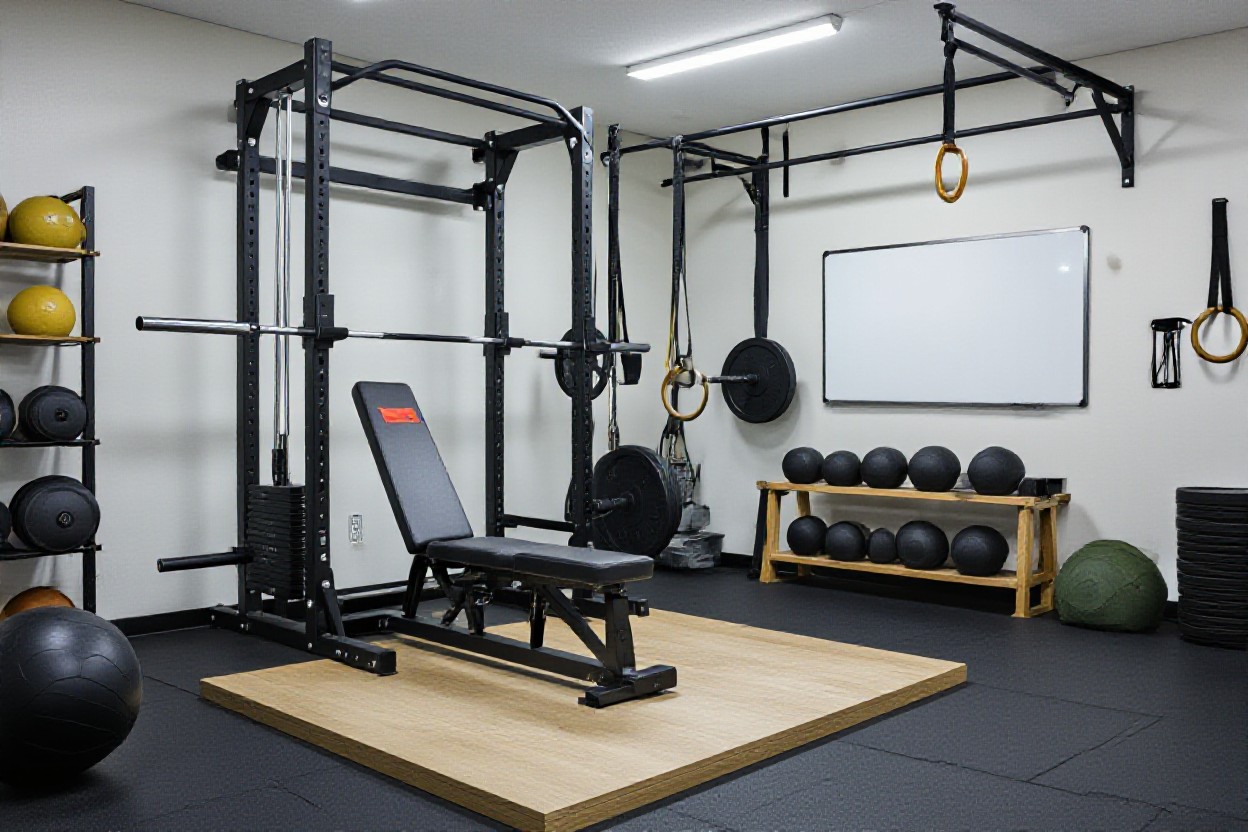
Tips From My Home Gym Experience
One morning I tripped over a stray kettlebell and realized my setup needed a serious reset, not more gear. You probably don’t need extra equipment, you need better layout, smart storage, and a simple way to track what you did. I’ve found that limiting my active gear to 5-6 pieces in reach keeps workouts sharper and safer. The small stuff like flooring quality, airflow, and lighting usually has a bigger impact on your consistency than the next fancy attachment.
- Wall-mounted storage for bands, bars, and small accessories
- Clear training zones for strength, mobility, and conditioning work
- Session templates saved on your phone for 30, 45, and 60 minute workouts
- Non-slip flooring around heavy lift and kettlebell areas
- Built-in warm-up habits so you stop skipping prep sets
- Simple lighting upgrades to keep you training when it’s dark out
- Visible progress markers like rep PR boards or timer screenshots
- Dedicated reset time each week to tidy, inspect gear, and plan sessions
Creating a Space You’ll Actually Love
One of my clients stuck a cheap full-length mirror beside his squat rack and his training frequency jumped from 2 to 4 days a week, just because the space finally felt like his. You want a corner that feels inviting, not like a storage unit with some dumbbells tossed in. Add small things like warm light, a fan, and a Bluetooth speaker so you actually look forward to stepping in there. The more your setup feels like a legit training nook, the more your brain treats those sessions as non negotiable.
Keeping It Fun and Motivating
A lifter I coach started doing a 10 minute daily challenge board with his kids and suddenly the whole family was fighting over who gets the kettlebell first. You can steal that same idea with weekly mini-goals, stuff like “40 perfect push ups” or “5 minutes straight on the bike”. Mix playlists, throw in a monthly test workout, and rotate one new variation every couple of weeks. The consistency you want usually shows up once training feels more like a game than a chore.
On the motivation side, you’ll get way more mileage out of visible proof than vague hype, so set up a small whiteboard or note app where you log top sets and times in real time, no fancy tracking tool required. I’ve seen people double their training weeks just by snapping a quick photo of their last timer screen and dropping it into a private album, because scrolling that album later quietly reminds you what you’re capable of. Stack that with a couple of non negotiables like “Monday carries, Wednesday squats, Friday swings” and your week basically runs itself. The trick is making progress feel obvious and kind of fun, so every session feels like you’re adding one more small win to a trail of receipts you can’t really argue with.
Here’s the Step-by-Step Setup Guide
| Step | What You’re Doing |
| 1. Measure & Map |
You grab a tape measure, sketch your floor plan, and mark a clear 8 ft x 8 ft minimum training zone so swings, lunges, and carries all fit safely. |
| 2. Anchor & Protect |
You install rigid wall/ceiling anchors rated 400+ lb for bands and suspension trainers, then drop 10-15 mm rubber tiles to shield joints and floors. |
| 3. Gear Zoning |
You park heavier gear (rack, barbell, adjustable bench) on one side, leaving a clear lane for sled drags, carries, and crawling patterns. |
| 4. Storage Setup |
You mount vertical storage for kettlebells and plates, keeping handles chest-height so you can grab and rack weights without sketchy low-back rounding. |
| 5. Tech & Lighting |
You position a small tripod or wall tablet at eye level for form checks, then use two light sources to kill harsh shadows on key lifts. |
Planning Your Layout Like a Pro
Ever notice how the best training spaces feel like everything just flows, no clutter, no wasted movement? You start by carving out a clear movement corridor of 8-10 feet for lunges, carries, and crawling, then wrap storage around that like a horseshoe. So you keep heavy stuff near walls, light and mobile tools closer to your main training square, and you always leave a bailout path so you can safely drop a loaded bar or bell if a set goes sideways.
Putting It All Together – The Final Touches
What actually turns this pile of gear into a place you’re excited to train in four times a week? You dial in small details: a wall-mounted whiteboard for tracking PRs, a cheap Bluetooth speaker in the corner, towels and chalk within arm’s reach, and a simple charging station for your phone so you can film sets without battery anxiety. And once your 10-minute reset routine after each session is locked in, the whole space basically runs on autopilot.
Because this is where the setup shifts from “home workout corner” to a legit training environment, you want the vibe and function to line up with your goals. So you might hang a couple of hooks for your weight belt and bands, keep your top 3 kettlebell sizes in a dedicated row, then stash specialty toys off to the side so they don’t steal attention from the meat-and-potatoes work. A tiny bench or crate where you can tie your shoes, drop your logbook, and set a timer sounds silly, but it keeps you in the room, not wandering back to the living room. And if you add one simple rule – every tool goes back to its exact spot after the last set – your future-self walks into a space that feels ready, focused, and weirdly motivating before you’ve even touched a weight.
What Factors Should You Seriously Consider?
You’re standing in your spare room, tape measure in one hand and your bank app open in the other, trying to figure out how much functional training equipment you can realistically fit without turning the place into a shin-destroying obstacle course. Think about space, budget, noise levels, and how often you’ll actually train, then cross-check that with guides like Creating Your 2026 Home Gym: Must-Have Equipment for … so you’re not guessing. Thou should treat this like a mini renovation project, not an impulse Amazon haul.
- Space efficiency for multi-use training zones
- Budget planning for both gear and flooring
- Safety and load capacity for floors, racks, and anchors
- Noise control if you’ve got neighbours or sleeping kids
- Progression potential so your setup grows with your strength
Space Limitations and Budget Talks
Picture your 3 x 3 m garage bay: once you park a squat rack, a flat bench, and some adjustable dumbbells, things get tight fast, especially when you add rubber tiles or plyo work. So you sketch zones, prioritize gear that folds or stacks, then match that against a realistic monthly spend so you’re not maxing cards for a pair of Olympic plates. Thou should treat floor space and cash as fixed assets you allocate with intent, not wishful thinking.
Personal Goals That Matter
Imagine planning for 12 months instead of 12 days: if your aim is fat loss, you’ll lean into sleds, kettlebell complexes, and conditioning pieces, while strength-focused lifters might pour more money into a power rack, barbell, and plates. Because every goal demands specific tools, your setup should mirror the way you actually want to move, not what looks sexy on socials. Thou build a home gym around your future self, not the mood you’re in this weekend.
When you zoom in on those personal goals, things get surprisingly measurable: chasing a double-bodyweight deadlift shifts you toward heavy pulling capacity, 20-30% more plate weight than you think, and stable flooring rated above 500 kg per square meter, while a goal like running a faster 5K pushes you to add sled drags, incline treadmill intervals, and unilateral strength work for ankle and hip stability. You might program 3 days of strength with specific progressions (say, adding 2.5 kg weekly to squats) plus 2 days of conditioning, which in turn tells you you’ll need timers, clear floor lanes, and enough load variety to avoid plate-sharing nightmares mid-workout. And because motivation is fragile, you dial in your environment with visuals like a whiteboard for tracking PRs, visible micro plates for small wins, and easy access to bands and sliders so warm ups don’t become an excuse to bail. Thou anchor your gear choices in the numbers and habits that will actually move those goals from nice ideas to something your training log can prove.
Pros and Cons of a Home Gym – Is It Really Worth It?
You’ve probably seen someone on social media turn a cluttered garage into a legit training space and thought, “Could I actually pull that off?” A home gym can be insanely effective for your functional workouts, but it’s not all PRs and progress pics. Before you commit your money, floors, and maybe your parking spot, it helps to line up the real-world upsides and the stuff that can quietly sabotage your goals.
| Pros | Cons |
|---|---|
| 24/7 access to train whenever your schedule allows, even at 5:30 a.m. or 10 p.m. | Upfront cost can easily hit $800-$2,000 for a solid functional setup. |
| No commute, so you can convert 30 minutes of driving into 30 minutes of quality movement. | Limited space might cap heavier lifts or loaded carries if your ceiling is low or room is tight. |
| Gear is always set up the way you like it, with your rack height, band anchors, and layout dialed in. | Lack of social environment can make long-term consistency harder if you thrive on group energy. |
| You can tailor equipment to your goals, focusing on functional tools instead of random machines. | Noise and vibrations from dropping weights may annoy neighbors or family in small apartments. |
| Better hygiene since you control who touches your bars, bells, and flooring. | Maintenance and repairs are on you, from rust on kettlebells to torn resistance bands. |
| Kids see you train, which quietly normalizes daily movement and strength at home. | Distractions at home – emails, kids, chores – can bleed into your training time. |
| Over 12-18 months, saved membership and fuel costs can outweigh the gear investment. | Limited coaching feedback if you’re not using online programming or video technique checks. |
| You can train the exact movement patterns you use at work or in your sport without compromise. | Climate control might be tricky in garages or basements that run too hot or too cold. |
| Session length is flexible, so you can stack micro-sessions of 10-15 minutes throughout the day. | Storage issues pop up if you add larger gear like sleds, rowers, or multiple bars. |
| Privacy lets you test new skills, heavy lifts, or rehab drills without feeling watched. | Motivation dips can sneak in when there’s no coach or class waiting for you to show up. |
Benefits that’ll Keep You Going
One client of mine swapped a 45-minute commute to a crowded gym for a simple rack, rings, and kettlebell in his spare room, and his weekly training time literally doubled. When your gear is 10 steps away, you’re far more likely to hit that 20-minute mobility block or those sneaky core finishers. You stack tiny wins all week, and over 6-12 months that consistency quietly turns into real strength, better conditioning, and fewer missed sessions.
Potential Pitfalls to Watch Out For
I’ve watched people drop $1,500 on shiny gear, use it hard for 3 weeks, then let it collect dust next to the holiday decorations. At home it’s painfully easy to say, “I’ll train later” while emails, kids, and Netflix pile up. Without a plan or some guardrails, your beautiful setup can turn into a very expensive laundry rack and that’s not what you’re aiming for.
What tends to trip you up isn’t just the money or the gear, it’s the lack of structure. You might underestimate how much motivation you normally borrow from a coach, a class time, or just seeing other people grind. At home, nobody cares if you skip your warm up, cut sets short, or bail on Thursday completely. So you want to counter that by treating your training like an appointment in your calendar, using programs that spell out exactly what to do, and maybe sending form videos to a coach or training buddy. When you pair your home setup with that kind of accountability, you keep the progress curve heading up instead of slowly flatlining.
My Take on Making It Work for You
You don’t need a fancy studio setup – you need a setup you’ll actually use 3 to 5 days a week without dread. Start by picking 4 to 6 pieces that hit pushes, pulls, hinges, squats and carries, then build out from there using guides like Best Home Gym Equipment (2025) so you’re not guessing. If your space is tiny, you might lean harder on adjustable dumbbells plus a sandbag, if you’ve got a garage, a rack and sled suddenly make sense. The winning setup is the one that fits your floor space, budget, and attention span, not somebody’s “dream gym” on Instagram.
FAQ
Q: What gear do I actually need for a functional home gym in 2026, without wasting money?
A: Most people think they need a full commercial setup, but for functional training at home in 2026, you can get a lot done with a smart mix of versatile tools. Start with a solid adjustable dumbbell set, a pair of adjustable kettlebells, and resistance bands with door anchors, because those three cover pushing, pulling, squatting, hinging, and core work really well.
Then layer in a suspension trainer, a foldable or wall-mounted squat rack with a pull-up bar, and a decent adjustable bench. If you like cardio, an air bike or a compact rower is gold, but if budget is tight, a weighted jump rope plus some floor space for shuttle runs is plenty. The gear that makes the cut is the gear that works in multiple planes of motion, so if something only does one thing, think twice before buying it.
Q: How much space do I realistically need for a functional training setup at home?
A: You can do more in a small space than you think, especially if you plan it like a Tetris board instead of a showy Instagram gym. For true full-body functional sessions, about 6 ft by 8 ft of clear floor space is the sweet spot, and 7 ft of ceiling height is usually enough as long as you’re not doing heavy overhead work with long barbells.
If your space is tiny – like studio-apartment tiny – go vertical. Use wall-mounted racks, foldable squat racks, and hooks for bands, suspension trainers, and ropes. Store dumbbells and kettlebells under a bench or in a corner rack. As long as you can step forward, back, and laterally without kicking furniture, you can build a legit functional setup.
Q: What are the smart tech upgrades for a 2026 home gym that actually help, not just look fancy?
A: Fitness tech finally started getting more practical, so in 2026 the best upgrades are the ones that track effort, not just steps. A solid heart rate strap or armband plus a training app that logs your strength sessions is way more useful than a giant mirror that yells at you.
Smart adjustable dumbbells or cable systems can be worth it if you train often and hate changing plates, but make sure they have mechanical backups so you’re not stuck when the app glitches. A simple webcam or phone stand for form checks, plus a cheap tripod light, is surprisingly helpful too if you like following live or recorded classes. Tech is great, but only if it helps you train harder, safer, or more consistently.
Q: How do I choose between barbells, dumbbells, and kettlebells for functional training at home?
A: Think about your goals and your space before you fall in love with one tool. Barbells are amazing for heavy squats, deadlifts, and presses, but they eat up space and need a rack, plates, and decent flooring.
Dumbbells are the most flexible option for most people at home, especially adjustable ones that go from light to pretty heavy. Kettlebells shine for swings, cleans, snatches, and loaded carries that feel really athletic and transfer well to real life. If you’re tight on space and money, do this: adjustable dumbbells first, then a couple of medium-weight kettlebells, and only go barbell if you’re serious about heavy lifting and have room to treat it properly.
Q: What flooring and safety basics should I set up so I don’t wreck my body or my house?
A: Your floor is the unsung hero of a good home gym, especially for functional stuff where you’re moving in different directions, sometimes fast. Go for interlocking rubber tiles or thick rubber mats at least 8 mm thick in the main lifting zone, especially where dumbbells or kettlebells might get dropped.
For safety, stable equipment beats fancy equipment every time. Bolt racks to the wall or floor if the design allows, check your pull-up bar anchoring twice, and give yourself fall space around heavy lifts. Keep a small first aid kit, a lifting belt (if you go heavy), and chalk or liquid grip nearby. When in doubt, lift within your control instead of ego-lifting in a tight room with drywall right behind you.
Q: How should I design actual workouts in a home gym for functional training rather than just random exercises?
A: Start with movement patterns, not muscles. Every week you want some version of squat, hinge, push, pull, carry, rotate or anti-rotate, and some kind of locomotion like crawling, shuffling, or sprinting in place.
A simple template works great at home: 5 minute warm up, then 3 blocks of 2-3 exercises each. For example, try squats, rows, and loaded carries in block one, then hinges, presses, and core work in block two, then some short conditioning intervals (bike, rope, bodyweight circuits) in block three. Rotate tools across the week – barbell or heavy dumbbells one day, kettlebells and bands another, mostly bodyweight plus suspension trainer on a third day – so your body keeps adapting without you needing more gear.
Q: What’s a reasonable budget for a functional home gym in 2026 and how should I prioritize spending?
A: Think in phases, not one giant shopping spree. For most people, a very capable 2026 functional setup lands somewhere between $400 and $1500 depending on your taste, space, and how heavy you plan to lift.
Phase 1: get adjustable dumbbells, resistance bands, a suspension trainer, and basic mats. Phase 2: add a rack with pull-up bar, a bench, and maybe a kettlebell or two. Phase 3: upgrade to a barbell and plates, a conditioning machine if you love that style, and maybe a couple of tech pieces like a heart rate monitor or smart display. Spend first on the stuff that will get used 3 times a week, not the stuff that just looks cool in photos.