There’s this big shift happening where yoga studios and online classes are finally talking about adaptive yoga, and it’s about time because your body, your age, your abilities – they all deserve a practice that actually fits you. In this guide, you’re going to explore how to tweak classic poses so they feel safe, joint-friendly, and actually enjoyable, whether you’re 8 or 80. If you like digging deeper, check out Adaptive Yoga For Every Fitness Level to see how your mat can become a space for real, long-term progress.
What Are Adaptive Yoga Poses, Anyway?
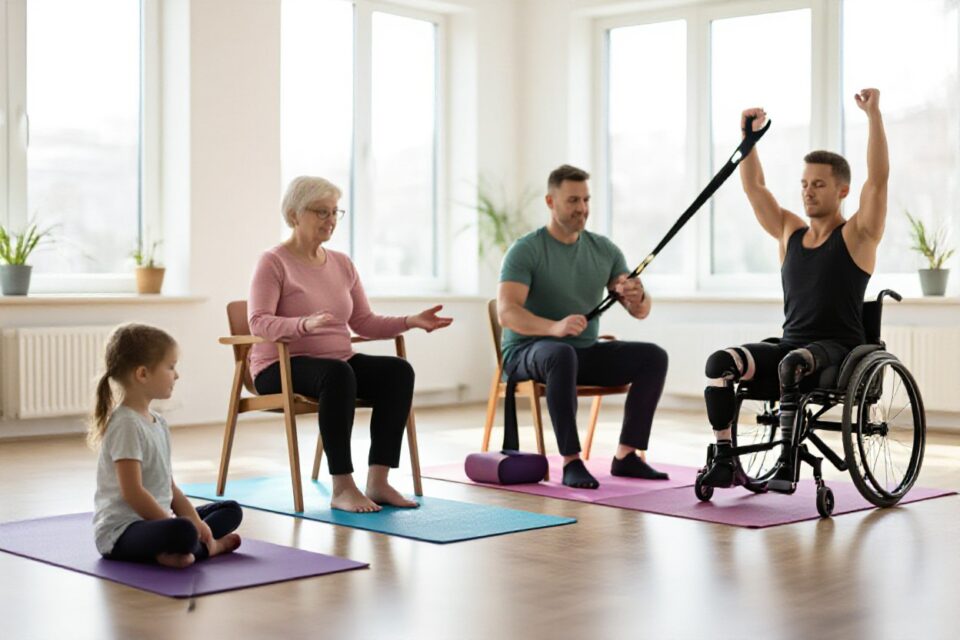
Think of adaptive yoga poses as your personal remix of classic yoga – same benefits, but shaped around your body, not the other way around. You might use a chair, wall, strap, or even your kitchen counter to support joints, ease balance issues, or lower pain, and still get real strength and flexibility gains. For a deeper dive, check out Adaptive Yoga: Making Yoga Accessible for Everyone so you can start building a practice that actually fits your life.
Types of Adaptive Yoga Poses
Instead of forcing yourself into one “perfect” shape, you play with different types of adaptive yoga poses that match your energy, mobility, and mood on any given day. Some people only need a folded blanket, others feel safer doing half their practice at the wall or fully seated, and both are 100% valid. Assume that you’re allowed to change the setup every single session as your body changes.
- Chair yoga for seated or supported standing variations
- Wall-supported poses to improve balance and reduce strain
- Prop-assisted stretches using blocks, straps, and bolsters
- Bed or couch yoga for low energy or joint-sensitive days
- Gentle restorative poses focused on deep rest and recovery
| Chair-supported Mountain | Lets you build posture and leg strength while seated or lightly holding the chair. |
| Wall-assisted Warrior II | Gives your back and shoulders support so you can focus on alignment, not wobbling. |
| Strap-aided Hamstring Stretch | Helps you safely lengthen tight legs without rounding your spine or overreaching. |
| Bolster-supported Child’s Pose | Reduces knee and hip pressure while keeping the soothing, grounding effect. |
| Bed-based Cat-Cow | Offers gentle spine mobility when getting to the floor isn’t practical for you. |
Why They Matter for All Ages
When you zoom out and look at the research, adaptive yoga shows up everywhere – older adults using chair flows to cut fall risk by up to 40%, kids with ADHD improving focus through short, structured breathing and movement, busy parents sneaking in 10 minute wall sessions to calm nervous systems fried by screens and stress. You don’t age out of these benefits, you actually grow into them, because your joints, hormones, and energy all shift over time and your practice needs to keep up, not stay frozen at what worked at 25.
What really stands out is how consistent the mental health wins are across different age groups, with studies reporting lower anxiety scores after just 6-8 weeks of modified practice that fits real bodies and real schedules. You might see a teen using bed poses before exams, a 45 year old doing supported hip openers for chronic lower back pain, and a 75 year old using a kitchen counter as their daily balance station, but the thread is the same: you get a sustainable tool for pain management, emotional regulation, and long term mobility. So if you’re wondering whether you’re too young, too old, or too “out of shape” to start, adaptive yoga basically shrugs and says, cool, let’s start exactly where you are today.
Let’s Talk About Tips for Success
You know that moment when you finally settle into a pose and your body goes, “ohhh, this is it”? That’s the vibe you’re aiming for with adaptive yoga. Use props freely, set tiny goals like 5 extra seconds of balance, and track progress in a quick journal so you actually see how far you’ve come. The most powerful shift happens when you treat every session as exploration, not a test.
- Use props like blocks, straps, chairs, and walls without hesitation.
- Start small with 5-10 minute sessions and build up gradually.
- Focus on breath to guide intensity and notice early signs of fatigue.
- Adjust poses instead of forcing yourself into textbook alignment.
- Track progress weekly with notes or photos, not daily perfection checks.
Preparing Yourself for Adaptive Yoga
Picture yourself sitting on the edge of your mat, a little unsure, maybe dealing with pain or stiffness, but still curious. You start by chatting with your healthcare provider, writing down any limitations and green lights, then you set one realistic intention like “I want to stand up with less effort.” The magic is in showing up consistently, giving yourself permission to adapt, and letting your energy level decide how hard you go that day.
Creating the Right Environment
Imagine rolling out your mat in a space that actually makes you exhale – soft light, your favorite blanket nearby, maybe a sturdy chair against the wall. You keep a small basket with your props, water, and a folded towel, so you’re not scrambling mid-pose, and you silence notifications so your nervous system can downshift. The environment should quietly whisper to your body, “you’re safe here, you can soften.”
When you set up your space, think like a designer and a safety officer at the same time. Clear a 4-by-6 foot area so you can move without tripping, check that floors aren’t slippery, and place your chair on a mat or rug so it doesn’t slide. Soft, indirect lighting helps your eyes relax, while a small speaker with low-volume music can mask distracting noise from outside. If balance is tricky, position your mat beside a wall or countertop so you’ve always got a steady support within arm’s reach. The more your environment reduces friction – fewer obstacles, fewer decisions – the easier it is to actually show up and do the work.
Step-by-Step: How to Do Some Basic Poses
With short-form workout videos blowing up on social media, it’s easy to think you’ve got to nail every pose instantly, but you’re going to get way more benefit by slowing things down and focusing on simple, repeatable steps. In the tables below, you’ll see how to set up, move, and exit each pose so your joints feel supported and your breath stays steady. You’ll get clear cues like “press evenly through both feet” or “support your knee with a block” so you can keep things safe, adaptable, and actually enjoyable.
| Pose | How To Do It Safely |
|---|---|
| Seated Mountain (Chair) | Sit toward the front of a sturdy chair, feet under knees, hip-width apart. Stack shoulders over hips, lengthen your spine, and place hands on thighs. Press feet gently into the floor, lift your chest, and soften your jaw. Hold 5-8 breaths without forcing; if your low back pinches, slide a folded blanket behind you for extra support. |
| Chair Cat-Cow | Keep feet planted and hands on thighs. As you inhale, slide your hands toward your knees, arch your back slightly, and open your chest. On the exhale, round your spine, let your chin drop, and glide hands toward your hips. Move slowly for 6-10 rounds, and avoid extreme arching if you have sensitive lumbar discs. |
| Supported Warrior II | Stand beside a chair, holding the backrest with one hand. Step your outside foot back, turning it slightly out, front toes facing forward. Bend your front knee so it stacks above the ankle, lifting through the crown of your head. Keep weight light in the back leg if your hips feel wobbly and use the chair as primary balance support. |
| Wall Plank | Place your hands on a wall at shoulder height, slightly wider than shoulders, fingers spread. Walk your feet back until your body forms a straight line from heels to head. Engage your belly lightly, soften your ribs, and press into the wall for 20-40 seconds. If your wrists ache, bring your hands a bit higher to reduce pressure. |
Gentle Chair Yoga Poses
With more people working from home and sitting for 8+ hours, chair yoga has become your secret weapon against that stiff, creaky feeling at the end of the day. You can do simple moves like seated twists, ankle circles, and gentle side bends without standing up, which is perfect when your knees or balance are acting up. The key is to move slowly, use a solid chair without wheels, and back off immediately if you feel sharp, pinching, or electric pain.
Floor Poses for Everyone
As more studios add mixed-level adaptive classes, floor poses are getting way more props for how customizable they really are. You can practice things like supported bridge, reclined butterfly, or side-lying twists using pillows, blocks, or folded blankets so your joints feel cushioned instead of cranked. The sweet spot is where your breath stays smooth for at least 5 full cycles and any stretch feels like a gentle pull, not a tear or burning sensation.
When you’re working with floor poses, you want to think in terms of angles and support, not “how far can I go”, right? For example, in supported bridge you might place a yoga block under your sacrum on the lowest height, knees bent, feet hip-width, and stay only 30 seconds at first, then slowly build up to 90 as your back adjusts. Side-lying twists can be done with a bolster between your knees to keep your low spine happier, especially if you’ve had disc issues or sciatica flares in the past. And if getting down to the floor is tricky, you can use a sturdy chair or the couch arm as a booster, taking your time so your transitions stay controlled, stable, and pain-free instead of rushed and risky.
Factors to Consider Before Diving In
Before you grab a mat and jump in, think of adaptive yoga like sizing shoes: if they don’t fit your body, your energy, or your schedule, they just sit in the closet. You want to weigh your health history, your mobility, and even your stress levels so you can tweak poses safely. This lets you work with your limits instead of fighting them, which is where the real progress and long-term practice live.
- health conditions
- mobility level
- pain signals
- energy and fatigue
- time and consistency
Personal Limitations and Needs
Some days your joints feel like they’re made of clouds, other days like rusty hinges, so you need to factor in your pain levels, past injuries, and daily energy before choosing a pose. Doctors often suggest chair variations for folks with balance issues or low blood pressure, while others might need wrist-friendly options instead of full plank. This helps you build a practice that supports your body instead of steamrolling it.
Setting Realistic Goals
Progress in adaptive yoga is less about touching your toes and more about what you can comfortably do 3 months from now with consistent 10-15 minute sessions. You might aim to hold a supported warrior pose for 30 seconds, or simply get up from a chair with less knee pain. This kind of goal-setting keeps you motivated without pushing into injury territory.
Real talk, realistic goals are your anchor when motivation starts to wobble a bit. Instead of chasing some Instagram-level backbend, you might pick a super specific target like breathing steadily through 5 slow cat-cow cycles or standing unassisted for 20 seconds, and track it in a simple notebook once a week. Research on habit formation suggests that even 2 minutes of a new behavior, done daily, can build momentum fast, so you can start tiny and still win. And when life gets messy, this style of goal lets you pivot – maybe you swap a 30-minute floor session for 8 minutes of chair yoga and still count it as a success.
The Pros and Cons: Is Adaptive Yoga Worth It?
What usually surprises people is that adaptive yoga can be both wildly freeing and a bit frustrating at the same time, especially when you’re juggling pain, fatigue, and limited time. You get tailored support, creative props, and classes that actually fit your body, but you might also hit barriers like higher costs or fewer local teachers who really know their stuff. So the real question becomes simple: do the long-term gains in mobility, confidence, and safety outweigh the hassles and trial-and-error you face at the start?
| Pros | Cons |
|---|---|
| Customized poses reduce strain on joints and sensitive areas | Skilled adaptive teachers can be hard to find in smaller cities |
| Increases independence with everyday movements like standing, reaching, and transfers | Classes and 1-to-1 sessions may cost more than standard yoga |
| Provides safer options if you have arthritis, scoliosis, or past injuries | Group classes might not match your exact pace or energy level |
| Boosts confidence and body awareness, even with long-term conditions | Finding accessible studios and transport can be a logistics headache |
| Supports nervous system regulation, easing stress and poor sleep | Some teachers still underestimate or overprotect your abilities |
| Can be combined with PT or OT to reinforce rehab goals | Online classes need cameras, space, and reliable internet |
| Offers social connection if you join small, supportive groups | Not every prop setup feels stable or safe right away |
| Short, 10-15 minute routines still provide meaningful benefits | Progress can feel slow if you’re managing fatigue or chronic pain |
| Adaptable across ages, from kids to adults in their 80s and 90s | You might need medical clearance for some conditions or surgeries |
| Encourages you to advocate for what your body needs in other settings | Expectations shaped by social media “yoga bodies” can mess with motivation |
Benefits of Adaptive Yoga
What really flips the script is how quickly small tweaks can change your day-to-day comfort: a supported forward fold might drop your back pain from an 8 to a 4 in just a few weeks, or a chair-based flow can help you stand up with less dizziness. You start to notice that 5 carefully adapted poses done most days beat one long, exhausting session, and that kind of steady, realistic practice is where your balance, strength, and confidence quietly start to climb.
Potential Challenges
What throws many people off at first is that adaptive yoga isn’t always instantly comfortable or convenient, even though it’s designed to help you. You might find that the studio you like has stairs, the online class moves too fast, or your insurance covers PT but not these sessions. Sometimes the hardest part is pushing past that awkward phase where you don’t yet trust the props, the teacher, or your own body, even though all three are working in your favor long term.
Some days you’ll wrestle more with logistics than with the poses themselves, like hauling a wheelchair into a cramped studio or trying to angle your camera so the teacher can actually see your alignment. Other times the mental stuff hits harder: feeling self-conscious in a room full of flexible bodies, or worrying you’ll slow everyone else down. And because progress can be subtle – less pain getting out of bed, fewer spasms at night – you might doubt it’s “working” at all. That’s why having a teacher who tracks your wins, even tiny ones like holding a pose 5 seconds longer or dropping one pain point on a 0-10 scale, becomes a big deal over time, it keeps you from quietly giving up just as your nervous system is starting to adapt.
My Take on Making Yoga Inclusive
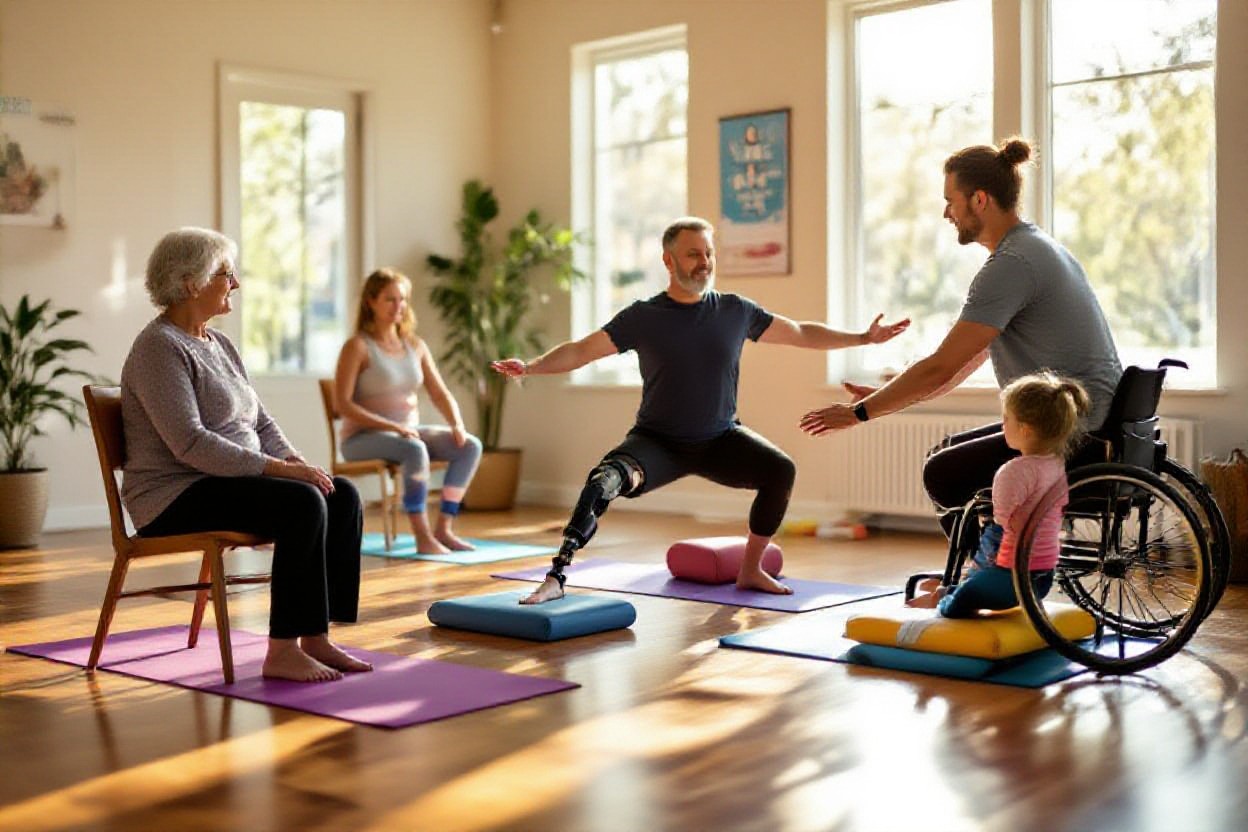
What really matters here is that you feel like you belong in every single class, not like you’re trying to squeeze into someone else’s idea of yoga. In my own sessions, I’ve watched people in their 70s, folks using wheelchairs, and complete beginners progress with simple tweaks to alignment, props, and pacing. You don’t need fancy gear, just clear communication and the guts to say, “this doesn’t work for my body, what else ya got?” That small sentence shifts the whole power dynamic in your favor.
Real-Life Experiences
One afternoon, a client with MS told me her goal was just to stand for 20 seconds without support, nothing flashy. After 6 weeks of adaptive chair-and-wall sequences, she hit 35 seconds, then 50, and her neurologist actually noted improved balance and reduced fatigue in her chart. You might think tiny adjustments don’t count, but those micro-wins stack up into very real confidence, better sleep, and a body that feels like an ally instead of an obstacle.
Encouraging Others to Join In
When you start modeling inclusive choices out loud, like asking for a chair or taking the gentler variation, you give everyone else in the room silent permission to do the same. I’ve watched whole classes shift after one person says, “I’m staying with the supported version,” and suddenly half the group relaxes and follows. That ripple effect is way more powerful than any advanced pose you’ll ever hit.
One super practical way you can nudge others in is by inviting a friend to a beginner or adaptive class and setting expectations ahead of time: “we’re going slow, we can leave after 30 minutes, no hero moves.” You can also email studios and ask, very directly, “what accessible options do you offer – chairs, walls, bolsters, captioned videos?” Because when owners see even 3 to 5 people regularly asking, they start adding more inclusive formats, clearer cueing, and better prop setups. You end up not just joining yoga, but quietly reshaping the ecosystem around you.
To wrap up
Presently you can probably picture yourself rolling out your mat, not trying to hit some perfect pose, just exploring what actually feels good in your body, at your age, with your history. When you keep adapting shapes, props, and pace, yoga stops being this rigid thing and turns into a practice that grows with you, supports your joints, and fits into real life – not the other way around. If you want fresh ideas and guidance, peek at Adaptive Yoga LIVE and let your practice evolve with you.