This guide will walk you through the entire process of making kombucha at home, ensuring you create a delicious and safe brew. I’ll share vital tips on fermentation times and explain how to avoid common pitfalls like contamination, which can be harmful. By following my instructions carefully, you’ll enjoy the

The Powerful Health Benefits of Kombucha
Every batch of homemade kombucha delivers a potent mix of probiotics, acids, and enzymes that work together to improve digestion, boost immunity, and promote detoxification. The natural fermentation process transforms simple tea and sugar into a dynamic elixir rich in beneficial bacteria that support your gut microbiome. Drinking kombucha regularly can enhance your energy levels and mental clarity, thanks to its unique compounds that balance your body’s internal environment. I’ve noticed how consistently integrating kombucha into my routine sustains my overall wellness, reinforcing its reputation as a fermented tonic with remarkable health properties.
Fermentation: Unlocking Probiotics and Nutrients
Fermentation turns sweet tea into a living beverage packed with probiotics like Lactobacillus and Acetobacter, which colonize your gut with healthy bacteria necessary for digestion and immunity. The SCOBY (Symbiotic Culture of Bacteria and Yeast) converts sugars into organic acids, B-vitamins, and enzymes, significantly amplifying the nutritional profile. During fermentation, antioxidants break down into bioavailable forms, and enzymes assist in nutrient absorption, making kombucha more than just a refreshing drink but a functional superfood that energizes and fortifies your body naturally.
The Role of Antioxidants in Your Health
Kombucha is rich in antioxidants derived from the tea base, such as polyphenols, which neutralize harmful free radicals implicated in aging and chronic diseases. These antioxidants not only protect your cells but also reduce inflammation and oxidative stress, factors linked to enhanced cellular repair and longevity. Regular kombucha consumption helps your body maintain a healthier oxidative balance, contributing to the prevention of cardiovascular issues and supporting cognitive function, making every sip a step toward better overall health.
Expanding on this, antioxidants found in kombucha come primarily from the tea leaves, with green and black teas providing catechins, theaflavins, and other polyphenols that defend cells against damage. Studies have shown that the fermentation process can increase antioxidant activity by up to 60%, making kombucha a more potent source than plain tea. These compounds not only slow down the aging process at a cellular level but also help regulate your immune response, potentially lowering the risk of diseases linked to chronic inflammation such as arthritis and even some cancers.
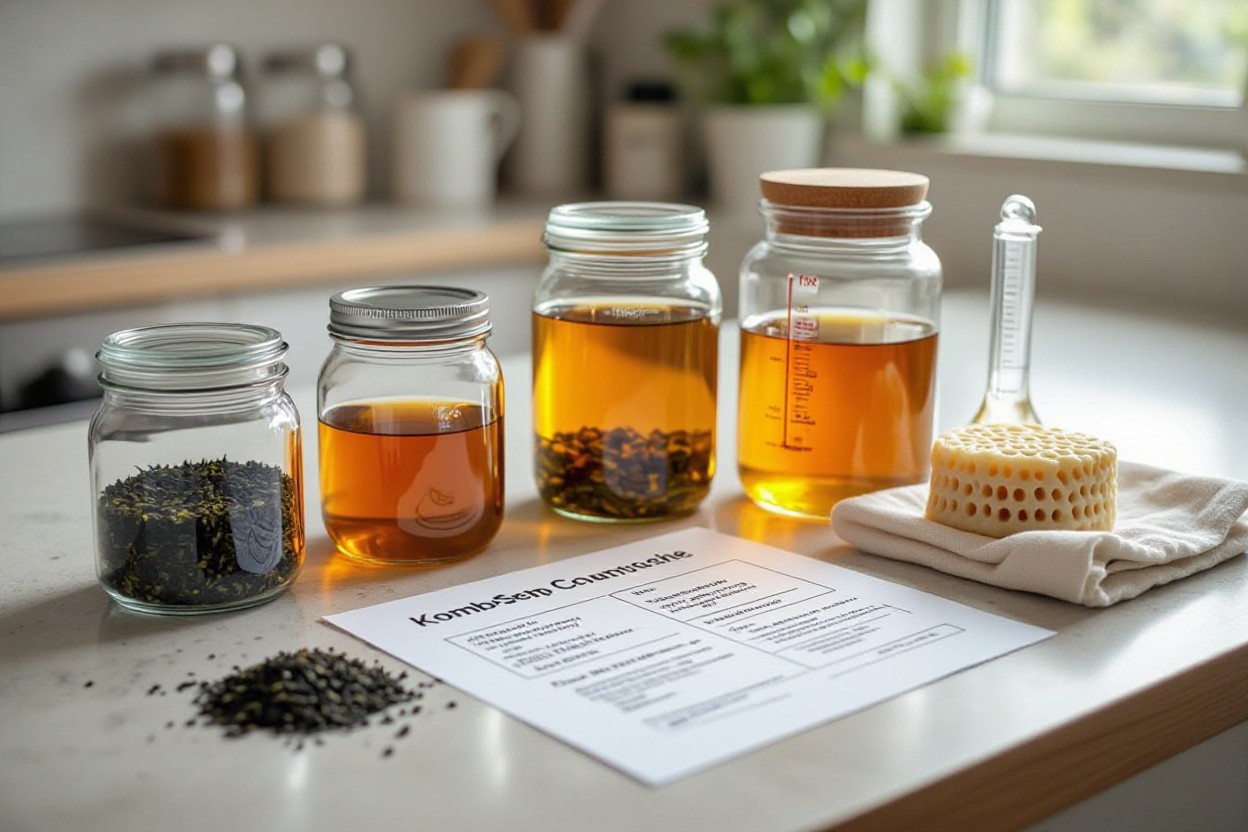
The Essential Ingredients and Equipment for Success
Every batch of kombucha hinges on a few fundamental components and the right gear to guide the fermentation process smoothly. From selecting the precise tea leaves to prioritizing sanitation with your equipment, these choices can directly impact the flavor and safety of your brew. Drawing from my experience, carefully balancing the elements below sets the stage for a vibrant, effervescent kombucha that’s both delicious and healthful.
Key Ingredients: Tea, Sugar, and SCOBY
Black or green tea provides tannins and nutrients that feed the SCOBY—a symbiotic culture of bacteria and yeast, which ferments the tea into kombucha. You’ll need plain white cane sugar, about one cup per gallon, as the yeast metabolizes it into alcohol and acids. The SCOBY itself looks like a rubbery pancake and acts as the heart of fermentation, converting sweet tea into tangy, probiotic-rich kombucha over 7 to 10 days.
Must-Have Tools: Vessels and Utensils
A wide-mouth glass jar around one-gallon capacity gives the SCOBY ample room to thrive while resisting acids and contaminants. Cover the opening with a tightly woven cloth or coffee filter, secured by a rubber band, to prevent airborne particles and insects from entering. Avoid metal containers, as acidic kombucha can corrode them and alter flavors. Clean utensils and measuring cups, ideally plastic or wooden, keep the environment sanitary and avoid any unwanted chemical reactions during stirring or bottling.
Glass is my go-to for fermenting kombucha because it’s inert and easy to sanitize with boiling water or vinegar solutions. The wide mouth not only facilitates easy cleaning but also provides necessary airflow for the SCOBY. Using a breathable cloth ensures oxygen exchange without risking contamination, striking the right balance for optimal fermentation. Plastic spoons or wooden paddles avoid risk of metal leaching or damaging the SCOBY compared to stainless steel or aluminum tools. These choices maintain quality and integrity throughout the brewing journey.
The Art of Brewing: A Step-by-Step Process
| Step | Description |
| 1. Preparing the Sweetened Tea Base | I begin by boiling filtered water and dissolving 1 cup of sugar per gallon, then steeping 8-10 grams of black or green tea bags for 10-15 minutes. This creates a nutrient-rich environment for the SCOBY to thrive and ferment properly, balancing sweetness and tannins for optimal flavor development. |
| 2. Introducing the SCOBY and Fermentation Process | After cooling the tea to room temperature, I add the SCOBY along with 1-2 cups of previously fermented kombucha to acidify the mixture. The SCOBY consumes sugar and releases probiotics over 7-14 days, and I watch for pH changes between 2.5 and 3.5 to ensure safe and effective fermentation. |
| 3. Secondary Fermentation for Flavor and Fizz | Once the primary fermentation concludes, I transfer the kombucha to airtight bottles with added fruit, herbs, or spices. Sealed for 2-5 days at room temperature, this encourages natural carbonation and infusion of vibrant flavors, taking advantage of residual sugars that fuel carbonation. |
Preparing the Sweetened Tea Base
Starting with a gallon of filtered water, I dissolve one cup of granulated sugar thoroughly before steeping 8-10 grams of quality black or green tea for about 10 to 15 minutes. Using loose leaf or bags that provide robust tannins helps nourish the SCOBY while imparting a balanced foundation. After steeping, cooling the tea to room temperature prevents damage to the delicate culture when added.
Introducing the SCOBY and Fermentation Process
Once the sweetened tea reaches room temperature, I gently introduce the SCOBY and add 1–2 cups of previously brewed kombucha to establish acidity. Over 7 to 14 days, the SCOBY metabolizes sugars into beneficial acids and probiotics, lowering the pH to the ideal range between 2.5 and 3.5. Monitoring these levels helps avoid unwanted pathogens and ensures a healthy, tangy kombucha.
Diving deeper, the fermentation metabolism involves the SCOBY’s symbiotic bacteria and yeast working in harmony: yeast convert sugars into alcohol, which bacteria then transform into acetic and gluconic acids, providing kombucha’s signature tang. This complex biochemical process also produces micronutrients, antioxidants, and trace amounts of ethanol—typically under 0.5% ABV—ensuring a safe and healthful beverage. Observing the SCOBY’s growth and the formation of a new pellicle on the surface signals active fermentation and readiness for the next stage.
Secondary Fermentation for Flavor and Fizz
After primary fermentation, I decant the kombucha into tightly sealed bottles and introduce natural flavorings like berries, ginger, or herbs. During the 2 to 5-day sealed fermentation, residual sugars ferment further, creating natural carbonation that results in a lively fizz. Keeping bottles at room temperature encourages this effervescent transformation while lock-sealing maintains CO2 buildup.
Exploring this step more, I emphasize careful pressure management because excessive buildup in sealed bottles can cause explosions. Using sturdy glass bottles with appropriate caps mitigates risks. Flavors added here infuse intensively, projecting nuanced profiles—such as spicy ginger enhancing warmth or tart berries bringing crisp fruitiness—while the carbonation elevates mouthfeel, making homemade kombucha a refreshing alternative to store-bought varieties.
Troubleshooting Common Brewing Challenges
Sometimes your kombucha brew may not develop as expected, and quickly pinpointing issues can save a batch. Variations in temperature, tea quality, or fermentation time often cause unexpected flavors or textures. I find keeping detailed notes on each batch helps me identify patterns, like consistently sour or overly vinegary brews due to extended fermentation beyond 14 days. Proper temperature control between 75-85°F encourages optimal SCOBY activity, avoiding sluggish fermentation that may lead to mold or off-tastes. Troubleshooting also involves adjusting sugar levels or using fresh starter tea to maintain the right balance between beneficial bacteria and yeast.
Identifying Off-Flavors and Their Causes
Detecting off-flavors involves distinguishing between the tangy, slightly sweet kombucha profile and sour or medicinal notes indicating issues. A sharp vinegar taste often signals over-fermentation or excess acetic acid bacteria. Moldy or musty flavors usually arise from airborne contaminants or unclean equipment, while overly sweet batches suggest incomplete fermentation. I noticed that kombucha with a rotten egg smell often points to too little oxygen circulation or excessive yeast growth. Adjusting brew time, ensuring SCOBY health, and maintaining sanitization helps me correct these flavor imbalances promptly.
Preventing Contamination and Ensuring Safety
Keeping the brew environment clean reduces contamination risks significantly. I always sterilize brewing vessels with hot water, avoid using metal utensils, and cover the jar with a tightly woven cloth to prevent foreign particles and insects. If you see fuzzy or vividly colored mold on the SCOBY surface, it’s safest to discard both the culture and liquid. Regularly washing your hands before handling ingredients and segregating kombucha from other fermentations in your kitchen prevents cross-contamination. Proper airflow and ambient temperatures help maintain a healthy SCOBY, reducing pathogen growth.
Beyond basic cleaning, I emphasize monitoring pH levels to ensure safety; values below 4.2 typically inhibit harmful microbes. Testing your brew with pH strips at the 7-day mark provides a reliable safety checkpoint. If pH remains above 4.5, extending fermentation or adding more starter tea fosters acidic conditions that suppress contaminants. Also, sourcing quality ingredients free from pesticides or additives supports the SCOBY’s robust microbiome. These precautions, combined with routine sensory checks—looking for abnormal slime or off smells—help keep your kombucha both delicious and safe.

Creative Flavor Pairings for Your Kombucha
Exploring flavor combinations transforms your kombucha from a routine brew into a personalized delight. I like to experiment by blending unexpected elements that balance sweetness, acidity, and aroma. Fresh ginger and turmeric root add a zesty kick while calming chamomile offers soothing floral notes. Bright citrus like yuzu or blood orange brightens the profile, and subtle vanilla beans provide smooth undertones. These pairings not only extend your flavor repertoire but also enhance the probiotic benefits by supporting natural fermentation.
Infusing with Fruits, Herbs, and Spices
Adding fresh or dried fruits, herbs, and spices during secondary fermentation unlocks vibrant flavors and complex aromas. I find sliced mango with fresh basil infuses a tropical yet herbaceous note, while cinnamon sticks and cloves contribute warm, spiced depth perfect for colder months. Use organic, pesticide-free ingredients to avoid contamination and start with small quantities to control potency. This layering method lets you craft sophisticated brews matched to your taste preference.
Seasonal Variations to Inspire Your Brews
Seasonal ingredients naturally guide your kombucha creations, inviting unique tastes with each harvest. Spring’s tart rhubarb or early strawberries brighten lighter batches, while summer herbs like lavender and mint refresh your palate. Autumn inspires incorporating apples, pumpkin pie spice, or cranberries for cozy, comforting brews. Winter’s bold ginger and cinnamon can add warming, invigorating effects to your drinks, complementing the probiotic benefits.
Looking more closely, seasonal brewing not only reflects changing flavors but supports sustainability by utilizing local produce at peak ripeness and affordability. Experimenting with small batch fermentations lets you adjust sweetness and acidity according to fruit freshness or spice intensity, creating balanced brews tailored to your environment. Keeping a log of seasonal flavor experiments serves as a personalized recipe guide that evolves over time, making your kombucha brewing both a creative and mindful hobby.
Summing up
Upon reflecting on the step-by-step guide to making homemade kombucha, I understand how accessible the process can be with the right approach. By carefully selecting your ingredients, maintaining a clean environment, and monitoring fermentation times, you can create a delicious and healthy beverage tailored to your taste. I encourage you to embrace experimentation and patience, as these elements will help you master your kombucha brewing skills and enjoy the rewarding experience of crafting your own probiotic drink at home.
Q: What ingredients do I need to start making homemade kombucha?
A: To make homemade kombucha, you will need tea (usually black or green tea), sugar, water, a SCOBY (Symbiotic Culture of Bacteria and Yeast), and starter tea from a previous batch of kombucha or store-bought raw, unflavored kombucha. These components work together to ferment and create the characteristic kombucha flavor.
Q: How do I prepare the sweet tea base for kombucha?
A: Begin by boiling water and dissolving sugar into it completely. Then, steep your chosen tea bags or loose tea in the hot water for 5 to 10 minutes, depending on your desired strength. After steeping, remove the tea bags or strain out the leaves and allow the sweetened tea to cool to room temperature before adding your SCOBY and starter tea.
Q: What is the purpose of the SCOBY in kombucha brewing?
A: The SCOBY serves as the living culture that ferments the sweet tea by consuming sugars and producing beneficial acids, gases, and probiotics. It is necessary for converting the sweet tea into kombucha through the fermentation process, giving the beverage its tangy flavor and natural carbonation.
Q: How long should I ferment my kombucha, and how can I tell when it is ready?
A: Typically, kombucha ferments for 7 to 14 days at room temperature. The exact time can vary based on your taste preference and environmental conditions. You can taste the kombucha after about a week; it should balance sweetness and tanginess. When it reaches the flavor profile you enjoy, the fermentation can be stopped by refrigerating the kombucha.
Q: Is it safe to reuse the SCOBY for multiple batches of kombucha?
A: Yes, the SCOBY can be reused multiple times for brewing new batches of kombucha as long as it remains healthy and free from mold or any foul odors. After each batch, cleanse your brewing vessel and keep the SCOBY in some starter tea to maintain its viability until the next use.
Q: Can I flavor my kombucha during the brewing process?
A: Flavoring kombucha is generally done during a second fermentation phase, after the initial fermentation is complete. You can add fruit juices, herbs, or spices before sealing the kombucha in bottles to create natural carbonation and infuse your desired flavors. Avoid adding flavorings during the first fermentation to prevent harming the SCOBY.
Q: How should I store homemade kombucha once it is ready?
A: Once kombucha reaches your preferred taste, transfer it to airtight bottles and refrigerate them to slow down fermentation and maintain flavor. Keep the bottles chilled, and consume within a few weeks to enjoy the best taste and carbonation. Always use clean utensils and bottles to prevent contamination.